Assalamualaikum!
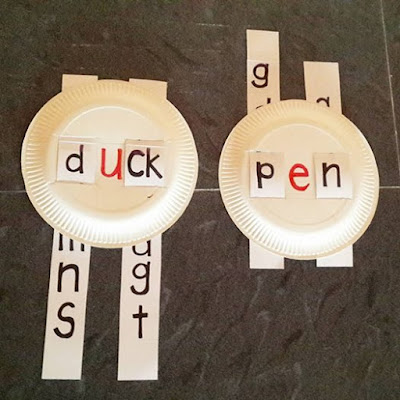
Since it was my first time to teach phonics to my students (as I just get posted last week), I decided to find some alternatives to make them understand better besides just say it out for them.
Phonemes : /u/ and /e/
(Year 1)
*What do you need :
Paper plates, thick paper or drawing block paper (200 gsm), markers, words to be written
*How to do it?
- Find the centre of the paper plates and marked it.
- From photo above, for the first letter, the spacing that I used is 4.5 cm while for the end letters I used 5 cm since some of the words contain 2 letters (The measurement might be different, depends on the size of your paper plates)
- Same measurement are used for the sliders. Ensure to write the letters with proper concern towards the above and below letters! (I kept erased them few times because I kept seeing parts of the letters on top of the letters that I'm going to show and vice versa.. Haha!)
- Write as many letters as you want, depends on the words that you wanted to show to the students.
At the same time, I found a YouTube channel which is really an enormous help for me to teach phonics. Check their channel here :
 |
| Phoneme /u/ |
 |
| Phoneme /e/ |
That's all for today! 'Til we meet again! :)


0 comments:
Post a Comment